
Call me crazy for making orecchiette pasta at home but that’s what happens when you are stuck at home for two weeks trying to recover from laryngitis. I may not have a voice but hey, I can still cook, bake and write!
The idea of making orecchiette pasta came when I mentioned to Luca that we will have homemade pesto for dinner. I have had orecchiette with pesto in the past and wondered if I can make them at home.

Looking up the recipe, I realized I had the ingredients at home but then again, the ingredients are just semolina flour and water. The challenge for me is shaping the orecchiette to make them look like small ears after which they are called.
Orecchiette Pasta – Ingredients
Adapted from https://www.martinafranca.info/orecchiette.htm
400 grams – Semolina Flour
200ml of warm water (this can vary slighty)
A pinch of salt
1. In a bowl add semolina flour and slowly add half of the water. I used the flour below.

2. Mix the flour and water together then add more water as needed. The dough should be smooth and not too wet nor dry.
3. Separate the dough into several pieces and roll them pencil thin. As you see, mine are not perfect! As a reminder, when not working with the remaining dough, keep them covered. I used cling wrap.

4. Cut pillows of dough about 1cm wide and with a knife shape them into orecchiette.

Here’s how to shape them by dragging the knife towards you (1-4). Then invert it and get the “hat” shape using your thumb. Viola, you have the orecchiette.

To help you further, here’s a video to shape the orecchiette. This person is a pro!
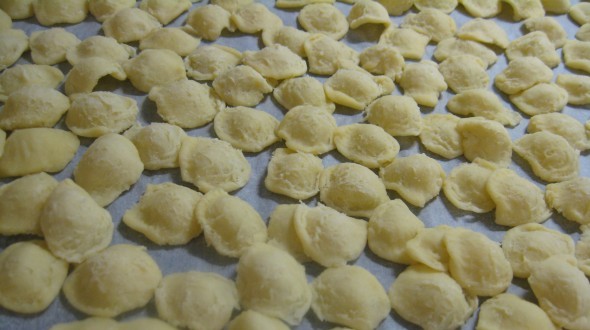
5. Lightly flour an area and leave them to dry. Not too bad for the 1st attempt, wouldn’t you say?

6. Boil a pot of water with some sea salt and cook the orecchiette. The cooking time for the orecchiette varies depending on how long they have been left to dry.
Note: I left the orecchiette to dry for about 8 hours and when I cooked them, it took more than 5 minutes. You just have to check them constantly.
7. With the orecchiette, I had them with pesto, potatoes and green beans.

However, for a classic recipe for orecchiette with broccoli rabe (cime di rapa), here’s a fabulous one to try out.
Overall, although shaping the orecchiette pasta may look intimidating, it’s really not that difficult and with practice you will be a pro at it in no time.
Heck no, I will not call you crazy! I say congratulazioni. How lovely that you wish to carry on the tradition of making this famous shape of pasta. I always smile when I see people making hand formed pasta. I love to do it myself. It is rewarding, fun, and it keeps the readitions alive. Good for you. I say bravissima! And I hope your laryngitis has completely resolved.
Thanks for your support 🙂 I am feeling better but it’s a slow recovery. Yeah I love learning how to make pasta the traditional way – just as an experience but that doesn’t mean that I don’t go to the supermarket and buy them 🙂 Love the good old fashion traditional dishes in general.
Ok, that cold is getting to your head lady! 😉
I buy the readymade thing and still find it such a task to cook it! And you take it from the scratch! This might be wonderful; but I don’t see myself doing this in a long long time!
Hi Hajra, haha you always make me laugh. Yes I told you that I was going crazy! Honestly, I had fun and though I will occasionally make them, I doubt it will be a weekly event. It’s not as hard as it looks and the repetitive motions are actually very therapeutic haha.